Some state and federal agencies have determined that used engine oil can be carcinogenic and cause reproductive toxicity. Avoid inhalation of vapors, ingestion, and prolonged contact with used engine oil. If not reused, dispose of in accordance with local environmental regulations.
WARNING
To reduce the possibility of personal injury, avoid direct contact of hot oil with your skin.
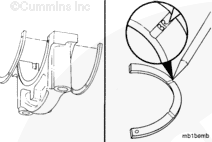
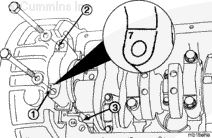
The main bearing caps are marked for position (1) on the camshaft side and the cylinder block identification (2) on the exhaust side. Mark any caps that are not marked before removing them from the cylinder block.
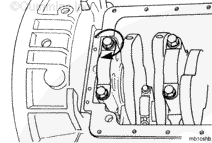
Remove the number 7 main bearing cap capscrews and washers.
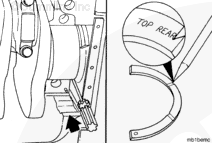
NOTE: The number 7 main bearing cap has thrust bearings and dowel pins.
NOTE: The service tool listed below
must
be centered on the cap.
Use the main bearing cap puller, Part Number ST-1178, to remove the cap.
Inspect the thrust bearings for nicks, scratches, or other damage.
NOTE: If the main bearings are damaged, inspect the crankshaft main bearing journals. If the crankshaft is damaged, the engine must
be removed for repair. Refer to Procedure 000-001 in Section 0.
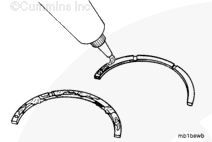
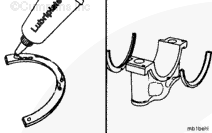
Use clean Lubriplate® 105, or equivalent, to lubricate the lower thrust bearings.
CAUTION
The grooves of the thrust bearing must be toward the crankshaft. The locating dowels must not protrude above the thrust bearing surface. Incorrect thrust bearing installation will result in engine damage.
Install the lower thrust bearings in the number 7 main bearing cap as illustrated.
The main bearing caps are marked for position (1) on the camshaft side and the cylinder block identification (2) on the exhaust side. The cylinder block identification number (3) is stamped on the pan rail on the camshaft side of the block. Install the caps in the correct position with the position number to the camshaft side and its part number toward the rear of the engine. Installation of main bearing caps into incorrect positions will result in severe engine damage.
Install the main bearing caps as follows:
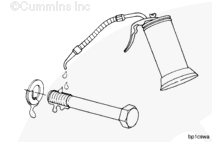
Align the capscrew holes in the cap with the holes in the cylinder block. Make sure the ring dowel and the lower bearing shell are in position.
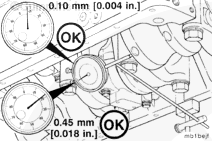
Measure the crankshaft end clearance. The end clearance specification for a new or reground crankshaft with new thrust bearings is 0.10 mm [0.004 in] to 0.45 mm [0.018 in].
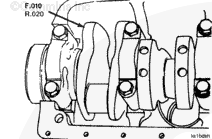
NOTE: Crankshafts that have been reground on the thrust bearing surfaces are marked for oversize thrust bearings on the rear crankshaft counter weight. If the crankshaft counter weight is marked, check the thrust ring part number to make sure the correct thrust ring size is used.
If the crankshaft end play is more than 0.56 mm [0.022 in], the crankshaft must be removed from the engine and repaired. Refer to the Alternative Repair Manual, Bulletin Number 3379035.
Some state and federal agencies have determined that used engine oil can be carcinogenic and cause reproductive toxicity. Avoid inhalation of vapors, ingestion, and prolonged contact with used engine oil. If not reused, dispose of in accordance with local environmental regulations.
WARNING
To reduce the possibility of personal injury, avoid direct contact of hot oil with your skin.

 WARNING

 CAUTION








;)
;)
;)
;)
;)
;)
;)
;)
;)
;)
;)
;)
;)
;)
;)
;)
;)
;)
;)
;)
;)
;)
;)
;)
;)
;)
;)
;)
;)
;)
;)
;)