Table of Contents

Initial Check
Leak Test


Initial Check

TOC

Before starting this procedure, confirm or verify the presence of an engine coolant leak from the cylinder head or the block head deck area.


SMALL | MEDIUM | LARGE

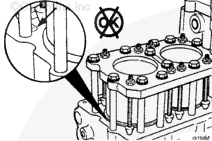
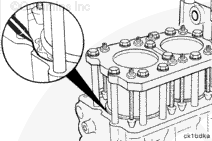
Look for signs of coolant leakage down the side of the engine block.


SMALL | MEDIUM | LARGE
   

Operate the engine to verify the coolant leak.

Use black light service tool, Part Number 3377308 or 3377293, and fluorescent tracer, Part Number 3377438, to pinpoint difficult to find leaks.

 
SMALL | MEDIUM | LARGE
   

Remove the cylinder head(s) where the leak is being generated. Inspect the cylinder head capscrews for signs of a coolant leak.


SMALL | MEDIUM | LARGE
   

When the cylinder head(s) is removed, cover the oil holes and tape off the push tube areas.


SMALL | MEDIUM | LARGE
   

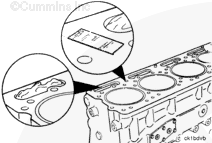
Inspect the gasket surfaces.

Inspect for burrs or other damage.

Use a medium grit hone or a crocus cloth to remove the burrs.


SMALL | MEDIUM | LARGE
   

If the block surface needs to be resurfaced, the engine must be removed from the vehicle at this time. Refer to the Alternative Repair Manual, Bulletin Number 3379035.


SMALL | MEDIUM | LARGE


Leak Test

TOC

Use cylinder block pressure test fixture, Part Number 3823745, to perform this test.


SMALL | MEDIUM | LARGE
   

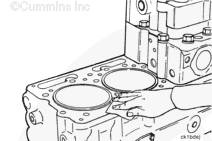
Clean the cylinder block deck surface with solvent on a shop towel.


SMALL | MEDIUM | LARGE
   

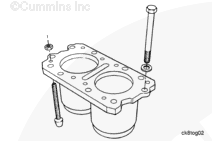
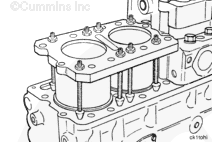
Install the cylinder block pressure test fixture, Part Number 3823745.

If less than three fixtures are used, all open coolant passage holes must be plugged. Check for leaks only around the cylinders covered by a fixture.


SMALL | MEDIUM | LARGE
   

Use clean engine oil to lubricate the cylinder head capscrews.

Allow the excess oil to drain from the threads.

Install 12 cylinder head capscrews and washers into each cylinder block pressure test fixture, Part Number 3823745.


SMALL | MEDIUM | LARGE
   

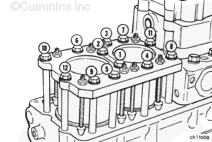
Tighten the cylinder head capscrews in the sequence illustrated.

Torque Value:  136  n.m  [100 ft-lb]


SMALL | MEDIUM | LARGE
   

Tighten down the eight coolant passage plugs. These plugs seal the coolant during the pressure test.

 
SMALL | MEDIUM | LARGE
   

Fill the cooling system with coolant. Refer to Procedure 008-018 in Section 8.

Pressurize the block between 70 kPa to 85 kPa [10 psi to 12 psi] for 15 minutes.

Make sure all of the air is purged from the cooling system, at least to the level of the block head deck. One coolant passage plug (highest) can be loosened to act as a vent while filling the cooling system.

 
SMALL | MEDIUM | LARGE
   

Check for coolant leakage.

If leakage is observed in a capscrew hole, repair the capscrew hole. Refer to Procedure 001-059 in Section 1.

After repairing the capscrew hole, repeat the Cylinder Block Counterbore Procedure from the beginning.


SMALL | MEDIUM | LARGE
   

If leakage is observed in any other place besides the capscrew holes, refer to the NH/NT 855 Counterbore Troubleshooting and Repair Manual, Bulletin Number 3810450.


SMALL | MEDIUM | LARGE
   

If no leaks are found at 68 N•m [50 ft-lb], tighten the cylinder head capscrews in the sequence illustrated.

Torque Value:  136  n.m  [100 ft-lb]


SMALL | MEDIUM | LARGE
   

If a capscrew hole(s) was the only leak found and no leaks are observed after the retest, the repair is complete.

 
SMALL | MEDIUM | LARGE


Last Modified:  11-Oct-2011
Feedback / Help