Table of Contents

Preparatory Steps
Remove
Clean
Pressure Test
Install
Finishing Steps


Preparatory Steps

TOC
 WARNING 

Coolant is toxic.  Keep away from children and pets. If not reused, dispose of in accordance with local environmental regulations.
 WARNING 

To reduce the possibility of personal injury, avoid direct contact of hot oil with your skin.
 WARNING 

Batteries can emit explosive gases. To reduce the possibility of personal injury, always ventilate the compartment before servicing the batteries. To reduce the possibility of arcing, remove the negative (-) battery cable first and attach the negative (-) battery cable last.


SMALL | MEDIUM | LARGE


Remove

TOC

For those engine applications utilizing the low mount oil cooler arrangement, follow the same procedure.

 
SMALL | MEDIUM | LARGE
   

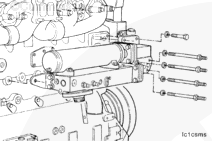
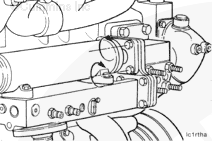
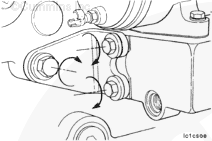
Remove the capscrew that holds the oil cooler support bracket to the cylinder block at the rear of the oil cooler.


SMALL | MEDIUM | LARGE
   

Remove one of the capscrews that holds the oil cooler support to the cylinder block. Install a guide stud in the hole.


SMALL | MEDIUM | LARGE
   

 WARNING 

This component or assembly weighs greater than 23 kg [50 lb]. To prevent serious personal injury, be sure to have assistance or use appropriate lifting equipment to lift this component or assembly.

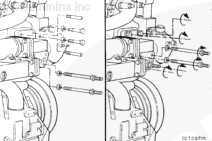
Remove the remaining five capscrews from the oil cooler support, and remove the cooler assembly.


SMALL | MEDIUM | LARGE
   

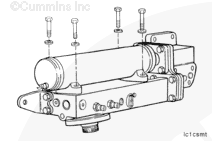
Remove the oil cooler core hold-down capscrews.

NOTE: The oil cooler core can be removed from the transfer housing while still installed on the engine.


SMALL | MEDIUM | LARGE
   

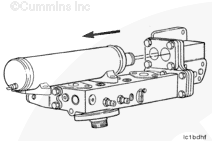
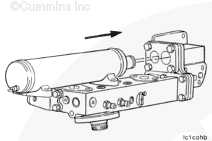
Remove the oil cooler core from the oil cooler transfer connection (housing) by pulling the oil cooler water transfer tubes out of the o-ring adapters.


SMALL | MEDIUM | LARGE


Clean

TOC

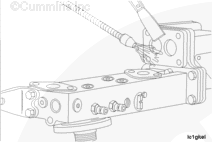
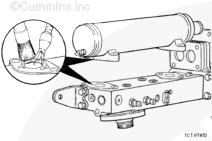
Clean the gasket material from the cooler support and the cylinder block.

After removing the gasket material, clean with solvent and dry with compressed air.

NOTE: Do not allow dirt or gasket material to fall into the oil passages.


SMALL | MEDIUM | LARGE
   

 CAUTION 

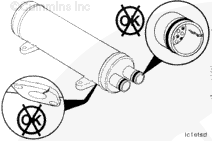
Do not attempt to repair a damaged oil cooler core; it must be replaced.
 
SMALL | MEDIUM | LARGE
   

Clean the gasket surfaces on the oil cooler housing and the oil cooler core.


SMALL | MEDIUM | LARGE


Pressure Test

TOC
 CAUTION 

Do not reuse an oil cooler core after an engine failure since there is not a practical method to clean the cooler core. Metal particles which can circulate through the lubricating system can remain in the cooler core and can cause engine damage. Do not allow dirt or gasket material to enter the oil passages when cleaning the oil cooler and the cylinder block surface.
 
SMALL | MEDIUM | LARGE
   

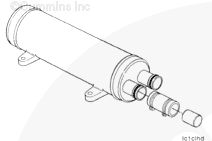
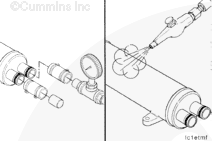
Install and clamp a short section of hose over either the inlet or outlet transfer tube of the oil cooler. Install a plug into the opposite end of the section of hose and install the clamp.


SMALL | MEDIUM | LARGE
   

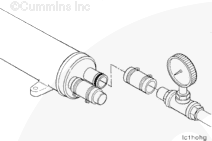
Attach a regulated air pressure hose to the other water transfer tube and apply air pressure.


Measurements
 kpapsi
Apply: 8160


SMALL | MEDIUM | LARGE
   

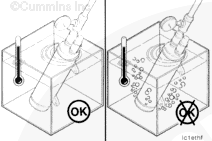
Submerge the oil cooler into a tank of water heated to 82°C [180°F] for 3 to 5 minutes and inspect for leaks.

NOTE: If leaks are found, replace the oil cooler core.


SMALL | MEDIUM | LARGE
   

 WARNING 

Wear appropriate eye and face protection when using compressed air. Flying debris and dirt can cause personal injury.

Remove the oil cooler core from the water tank.

Remove the hoses and the clamps from the oil cooler.

Use lubricating oil to flush the oil side of the cooler to remove all the water.

Dry the oil cooler with compressed air.


SMALL | MEDIUM | LARGE


Install

TOC

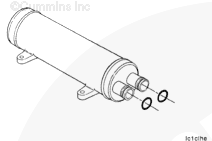
Lubricate new o-rings with vegetable oil and install onto the oil cooler core transfer tubes.


SMALL | MEDIUM | LARGE
   

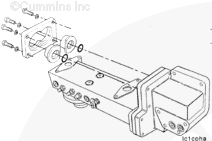
Install the connection retainer and o-rings adapters with new o-rings. Do not tighten the four retainer capscrews at this time. Adapters must be loose so they will align with the transfer tubes.

NOTE: Make sure to keep o-rings in place when installing the adapters and retainer.


SMALL | MEDIUM | LARGE
   

Install the oil cooler core onto the oil cooler transfer connection (housing) by inserting the transfer tubes into the o-ring adapters.

NOTE: Make sure the o-ring adapters move freely when the transfer tubes are inserted as this will allow tubes to be centered in the adapters.


SMALL | MEDIUM | LARGE
   

Install the oil cooler core mounting gaskets and holddown capscrews.

Tighten the holddown capscrews.

Torque Value:  27  n.m  [20 ft-lb]


SMALL | MEDIUM | LARGE
   

Alternately tighten the connection retainer capscrews.

Torque Value:  47  n.m  [35 ft-lb]


SMALL | MEDIUM | LARGE
   

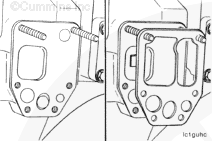
Install two guide studs into the oil cooler support mounting holes in the cylinder block.

Install a new oil cooler support gasket over the guide studs with the side marked “Cooler Side” facing outward or visible.


SMALL | MEDIUM | LARGE
   

For those engine applications utilizing the low mount oil cooler arrangement, follow the same installation procedure.

 
SMALL | MEDIUM | LARGE
   

Install the oil cooler assembly over the guide studs, and push it against the cylinder block.

Install the oil cooler support bracket capscrew. Do not tighten at this time.


SMALL | MEDIUM | LARGE
   

Install four of the support mounting capscrew, and remove the two guide studs.

Install the two remaining capscrews, and tighten all support capscrews.

Torque Value:  47  n.m  [35 ft-lb]


SMALL | MEDIUM | LARGE
   

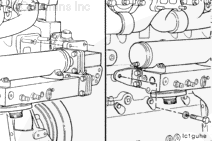
First, loosen the two capscrews which hold the oil cooler support bracket to the rear of the oil cooler housing.

Then, alternately and evenly, tighten the block mounting capscrew and the oil cooler housing capscrews beginning with the block mounting capscrew.

Torque Value:  47  n.m  [35 ft-lb]


SMALL | MEDIUM | LARGE


Finishing Steps

TOC
 WARNING 

Coolant is toxic.  Keep away from children and pets. If not reused, dispose of in accordance with local environmental regulations.
 WARNING 

To reduce the possibility of personal injury, avoid direct contact of hot oil with your skin.
 WARNING 

Batteries can emit explosive gases. To reduce the possibility of personal injury, always ventilate the compartment before servicing the batteries. To reduce the possibility of arcing, remove the negative (-) battery cable first and attach the negative (-) battery cable last.


SMALL | MEDIUM | LARGE


Last Modified:  12-Sep-2011
Feedback / Help