Table of Contents

Preparatory Steps
Remove
Clean
Inspect for Reuse
Install
Finishing Steps


Preparatory Steps

TOC


SMALL | MEDIUM | LARGE


Remove

TOC

Install the crankshaft gear puller, Part Number 3375840, and jaw onto the gear, Part Number 3824284.

Turn the pressure screw clockwise to remove the gear.

 CAUTION 

Do not damage the crankshaft when removing the key.

Use a flat chisel and a mallet to remove the crankshaft gear key.


SMALL | MEDIUM | LARGE


Clean

TOC
 WARNING 

When using solvents, acids, or alkaline materials for cleaning, follow the manufacturer’s recommendations for use. Wear goggles and protective clothing to reduce the possibility of personal injury.
 WARNING 

Wear appropriate eye and face protection when using compressed air. Flying debris and dirt can cause personal injury.

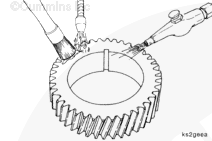
Clean the gear with solvent. Dry with compressed air.


SMALL | MEDIUM | LARGE


Inspect for Reuse

TOC

Inspect the crankshaft gear for cracks and broken or chipped teeth.


SMALL | MEDIUM | LARGE
   

Remove any burrs with a fine crocus cloth.


SMALL | MEDIUM | LARGE
   

Inspect the crankshaft gear fit area for burrs.

Remove any burrs with a fine crocus cloth.

Scratches must not exceed 0.79 mm [0.031 in] depth, and must be at least 3.2 mm [0.125 in] apart.


SMALL | MEDIUM | LARGE
   

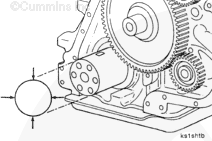
Measure the crankshaft gear bore.

Crankshaft Gear Bore Inside Diameter

mmin
95.394MIN3.7557
95.415MAX3.7565

Replace the crankshaft gear if it does not meet diameter specifications.


SMALL | MEDIUM | LARGE
   

Measure the crankshaft gear fit area outside diameter.

Crankshaft Gear Fit Area Outside Diameter

mmin
95.504MIN3.7599
95.522MAX3.7607

Replace the crankshaft if it does not meet diameter specifications.


SMALL | MEDIUM | LARGE


Install

TOC

Use a leather mallet to install a new key into the crankshaft keyway.

Heat the gear in an oven for a minimum of 1 hour at 204°C [400°F] not to exceed 4 hours maximum.


SMALL | MEDIUM | LARGE
   

 CAUTION 

Wear protective gloves when handling parts that have been heated to prevent personal injury.

Remove the gear from the oven.

NOTE: The gear must be installed within 30 seconds after being removed from the oven.

NOTE: The timing mark (1) and the gear part number (2) must be facing away from the crankshaft.

Align the gear keyway and the key, and install the gear firmly on the crankshaft.


SMALL | MEDIUM | LARGE
   

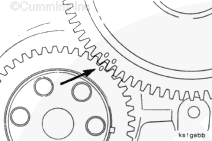
NOTE: If any gears were rotated, it will be necessary to align the timing marks of the crankshaft and the camshaft gears.

 
SMALL | MEDIUM | LARGE


Finishing Steps

TOC


SMALL | MEDIUM | LARGE


Last Modified:  06-Oct-2011
Feedback / Help